はじめに
仕事の都合でオープンソースのセキュリティ診断ツール「OpenVAS - OpenVAS - Open Vulnerability Assessment System」をUbuntuに何度かインストールしている。
にもかかわらず、インストール方法を作業のたびにググってる……
流石に効率悪すぎ! ってことで作業内容を書き留めておく。
環境について
OS
Ubuntu 13.10 (Saucy Salamander)
なんだけど、実際に使用したのは
Ubuntu Desktop 日本語 Remixのダウンロード | Ubuntu Japanese Team
にある64bit版。
OpenVAS
公式サイトのOpenVAS - Install OpenVAS Packagesを参考にインストール。
このサイトにはDebianへのインストール方法しか記載されていない。
けれども、どうしてもUbuntu13.10で動かしたいので一工夫した。
しかし! 推奨しがたい方法につき自己責任で m(_ _)m
インストール
ここからは基本的に公式サイトのDebian用インストール手順に従って作業を進めるが、コマンドラインの引数を一部Ubuntu用に変更する必要がある。
★★★以下、原則としてすべてroot権限で作業すること★★★
Step 1: Configure OBS Repository
リポジトリの場所
公式サイトには
http://download.opensuse.org/repositories/security:/OpenVAS:/UNSTABLE:/v6/Debian_7.0/
と記載されているが、Ubuntu用に以下のURIに変更する。
http://download.opensuse.org/repositories/security:/OpenVAS:/UNSTABLE:/v6/xUbuntu_13.04/
Ubuntu13.10にインストールするのにリポジトリが「13.04」なのは、2014年2月5日現在で13.10用が存在しないため。
とりあえずインストール完了後は問題なくOpenVASでサイトをスキャンしたりブラウザやコマンドラインからOpenVASをコントロールできてはいる。
というわけで、「Step 1: Configure OBS Repository」は下記のように修正して実行する。
- 元のコマンドライン
echo "deb http://download.opensuse.org/repositories/security:/OpenVAS:/UNSTABLE:/v6/Debian_7.0/ ./" >> /etc/apt/sources.list
wget http://download.opensuse.org/repositories/security:/OpenVAS:/UNSTABLE:/v6/Debian_7.0/Release.key
apt-key add ./Release.key
apt-get update
↓
- Ubuntu用に修正
echo "deb http://download.opensuse.org/repositories/security:/OpenVAS:/UNSTABLE:/v6/xUbuntu_13.04/ ./" >> /etc/apt/sources.list
wget http://download.opensuse.org/repositories/security:/OpenVAS:/UNSTABLE:/v6/xUbuntu_13.04/Release.key
apt-key add ./Release.key
apt-get update
Step 2: Quick-Install OpenVAS
Step 1の修正後の設定ではWebブラウザからOpenVASを管理するためのモジュールである「Greenbone Security Assistant」をインストールできない。
修正後のリポジトリに「Greenbone Security Assistant」インストール用のファイルが存在していないため。
「Greenbone Security Assistant」は別途インストールすることにして、Step 2の手順を下記のように修正する。
- 元のインストール用コマンドライン
apt-get -y install greenbone-security-assistant openvas-cli openvas-manager openvas-scanner openvas-administrator sqlite3 xsltproc rsync
apt-get -y install texlive-latex-base texlive-latex-extra texlive-latex-recommended htmldoc
apt-get -y install alien rpm nsis fakeroot
↓
apt-get -y install openvas-cli openvas-manager openvas-scanner openvas-administrator sqlite3 xsltproc rsync
apt-get -y install texlive-latex-base texlive-latex-extra texlive-latex-recommended htmldoc
apt-get -y install alien rpm nsis fakeroot
1行目のコマンドラインから ”greenbone-security-assistant” を外しただけ。
Step 3: Quick-Start OpenVAS
公式サイトには
(copy and paste whole block as user root, during first time you will be asked to set a password for user "admin")
「適当訳:root権限でまるごとコピペして実行しろ。途中でユーザー名"admin"のパスワード設定するんでヨロシク」
とあるが、まるごとコピペで実行するとキチンと完走しないことがまれによくある。
経験上推奨するのは細分化した下記の手順。
ブロックごとに実行結果(出力されたメッセージ)を確認する。
openvas-nvt-sync 実行
test -e /var/lib/openvas/CA/cacert.pem  || openvas-mkcert -q
openvas-nvt-sync
openvasmd --rebuild 実行
test -e /var/lib/openvas/users/om || openvas-mkcert-client -n om -i
/etc/init.d/openvas-manager stop
/etc/init.d/openvas-scanner stop
openvassd
openvasmd --rebuild
openvas-certdata-sync 実行
openvas-certdata-sync
ユーザー「admin」追加
ここで作成するアカウントをコマンド「omp」や「Greenbone Security Assistant https://localhost:9392/」で使用してOpenVASを操作する。
「-n」で指定されているのがOpenVASシステムへログインするアカウントのユーザー名。
パスワードの入力を促されるので設定してEnter。
test -e /var/lib/openvas/users/admin || openvasad -c add_user -n admin -r Admin
サービス起動
killall openvassd
sleep 15
/etc/init.d/openvas-scanner start
/etc/init.d/openvas-manager start
/etc/init.d/openvas-administrator restart
※公式サイトに記載されている
/etc/init.d/greenbone-security-assistant restart
は実行しない。
まだインストールしてないからね :P
なお、たまにサービス起動時に「ERROR:」から始まるメッセージが返ってくることがある。
そんな時は慌てずに、
- /etc/init.d/openvas-scanner restart
- /etc/init.d/openvas-manager restart
- /etc/init.d/openvas-administrator restart
の順で、それぞれのコマンド間で一休みしつつ起動し直すとERRORが発生しないこともある。
正直、原因不明…
Greenbone Security Assistant
ダウンロード&インストール
後回しにしていた「Greenbone Security Assistant」をdebパッケージでインストール。
リポジトリ(http://download.opensuse.org/repositories/security:/OpenVAS:/UNSTABLE:/v6/xUbuntu_12.10/amd64/greenbone-security-assistant_4.0.1_amd64.deb)からdebパッケージをダウンロード後、依存ライブラリをインストールしてからGreenbone Security Assistantをインストール。
環境によってはlibmicrohttpd10以外のライブラリを要求されるかも。
要求されたら下記コマンドラインの2行目に適宜追加する。
wget http://download.opensuse.org/repositories/security:/OpenVAS:/UNSTABLE:/v6/xUbuntu_12.10/amd64/greenbone-security-assistant_4.0.1_amd64.deb
apt-get install libmicrohttpd10
dpkg -i greenbone-security-assistant_4.0.1_amd64.deb
Greenbone Security Assistant 起動
root@virtual-machine:openvas# service greenbone-security-assistant start
Starting Greenbone Security Assistant: gsad.
以上ですべてのOpenVAS関連ツールのインストールは完了。
openvas-check-setup
公式サイトには OpenVAS - Setup and Start OpenVAS というページがあり、パッケージインストールかソースコードからビルドかを問わず、正常にインストールされたかどうかを確認するためのスクリプトを配布している。
※すべてroot権限で実行
wget --no-check-certificate https://svn.wald.intevation.org/svn/openvas/trunk/tools/openvas-check-setup
chmod +x openvas-check-setup
./openvas-check-setup --v6
結果の見方や対応方法は OpenVAS - Setup and Start OpenVAS を参照のこと(無責任)。
実行結果に
It seems like your OpenVAS-6 installation is OK.
が含まれていればオールOK!
サービス自動起動
単にインストールしただけではUbuntuを再起動した際にOpenVASの実行に必要なManagerやScannerなどが自動的に起動しない。
そこで、各種サービスを自動起動するように設定。自動起動の設定が必要なサービスは下記の4つ。
- greenbone-security-assistant
- openvas-administrator
- openvas-manager
- openvas-scanner
Ubuntuの作法に則って適当に設定すればいいけれど、お手軽に設定および確認するために「sysv-rc-conf」コマンドの使用をお勧め。
標準ではインストールされていない場合あり。apt-getやaptitudeコマンドなどで簡単にインストール可能。
sudo apt-get install sysv-rc-conf
インストール後、端末上でroot権限にて実行すると下記のような画面が表示される。
sudo sysv-rc-conf
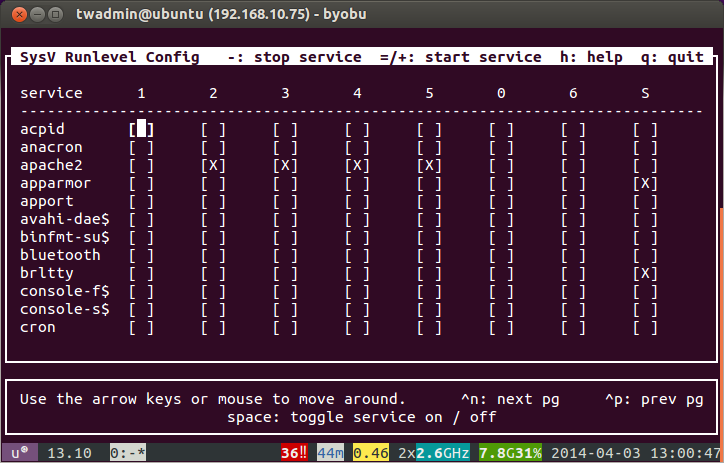
カーソルキーやCtrl-n, Ctrl-pなどで移動しつつ目的のサービスを表示して、2, 3, 4, 5にスペースキーや"=", "+"キーで「X」マークを設定。
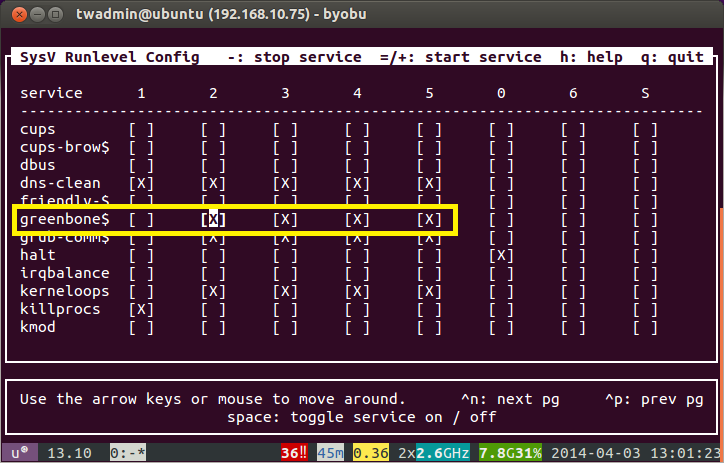
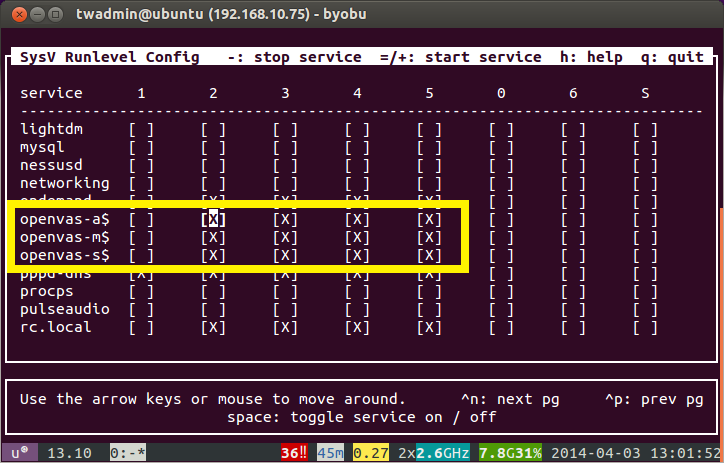
上記の図のように設定できたら"q"キーを押してsysv-rc-confコマンドの実行を終了。
動作確認
CLI経由 (ompコマンド)
OMP: OpenVAS Management Protocol
ompコマンドのリファレンスは http://www.openvas.org/omp-4-0.html に記載されている。
めっちゃ読みづらいけど頑張って!
コマンドの例
手っ取り早く確認するには下記のコマンドを実行してみる。
omp --username=admin --password=<設定したパスワード> --get-targets
omp --username=admin --password=<設定したパスワード> --get-report-formats
omp --username=admin --password=<設定したパスワード> --xml='<get_targets/>' --pretty-print
エラーなく実行できたらコマンドラインからのOpenVASによるスキャンが可能となっている(はず)。
実行結果の例
root@virtual-machine:~/openvas# omp --username=admin --password=******** --get-targets
b493b7a8-7489-11df-a3ec-002264764cea  Localhost

root@virtual-machine:~/openvas# omp --username=admin --password=******** --get-report-formats
910200ca-dc05-11e1-954f-406186ea4fc5  ARF
5ceff8ba-1f62-11e1-ab9f-406186ea4fc5  CPE
6c248850-1f62-11e1-b082-406186ea4fc5  HTML
77bd6c4a-1f62-11e1-abf0-406186ea4fc5  ITG
a684c02c-b531-11e1-bdc2-406186ea4fc5  LaTeX
9ca6fe72-1f62-11e1-9e7c-406186ea4fc5  NBE
c402cc3e-b531-11e1-9163-406186ea4fc5  PDF
a3810a62-1f62-11e1-9219-406186ea4fc5  TXT
a994b278-1f62-11e1-96ac-406186ea4fc5  XML

root@virtual-machine:~/openvas# omp --username=admin --password=******** --xml='<get_targets/>' --pretty-print
    <get_targets_response status_text="OK" status="200">
      <target id="b493b7a8-7489-11df-a3ec-002264764cea">
        <name>Localhost</name>
        <comment></comment>
        <creation_time>2014-02-08T09:14:39Z</creation_time>
        <modification_time>2014-02-08T09:14:39Z</modification_time>
        <writable>0</writable>
        <in_use>0</in_use>
        <hosts>localhost</hosts>
        <max_hosts>1</max_hosts>
        <port_range>T:1-5,7,9,11,13,15,17-25,27,29,31,33,35,37-39

... 中略 ...

        <port_list id="c7e03b6c-3bbe-11e1-a057-406186ea4fc5">
          <name>OpenVAS Default</name>
          <trash>0</trash>
        </port_list>
        <ssh_lsc_credential id="">
          <name></name>
          <port></port>
          <trash>0</trash>
        </ssh_lsc_credential>
        <smb_lsc_credential id="">
          <name></name>
          <trash>0</trash>
        </smb_lsc_credential>
      </target>
      <filters id="0">
        <term></term>
      </filters>
      <sort>
        <field>name
          <order>ascending</order>
        </field>
      </sort>
      <targets max="-1" start="1"></targets>
      <target_count>1
        <filtered>1</filtered>
        <page>1</page>
      </target_count>
    </get_targets_response>
ompを実行するたびにユーザー名やパスワードを書きたくない場合はOSユーザーのホームディレクトリに「omp.config」という名前の設定ファイルを作成する。
[Connection]
host=localhost
port=9390
username=admin
password=********
パスワードが記載されているのがマズい場合は「password」項目を削除することでコマンド実行のたびにパスワードを問い合わせてくれる。
Greenbone Security Assistant経由 (https://localhost:9392/)
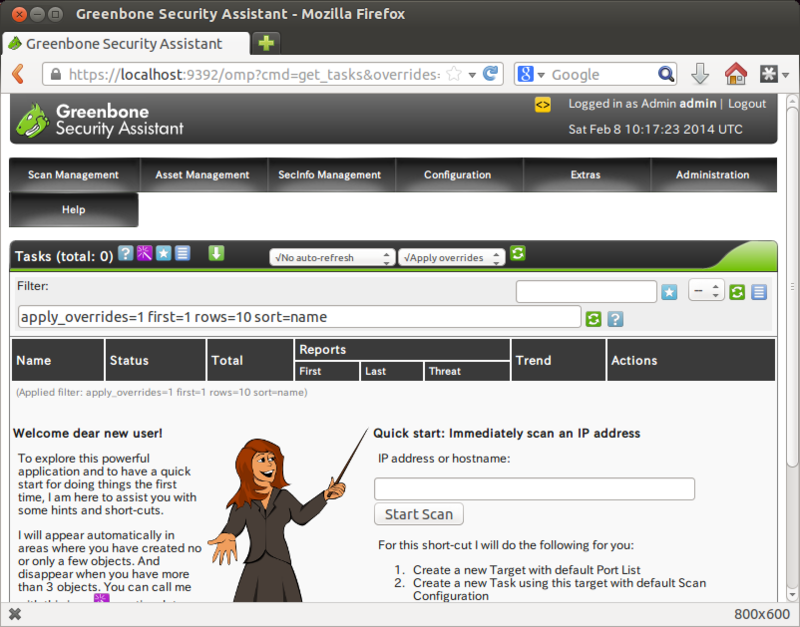
Webブラウザで https://localhost:9392/ にアクセス。
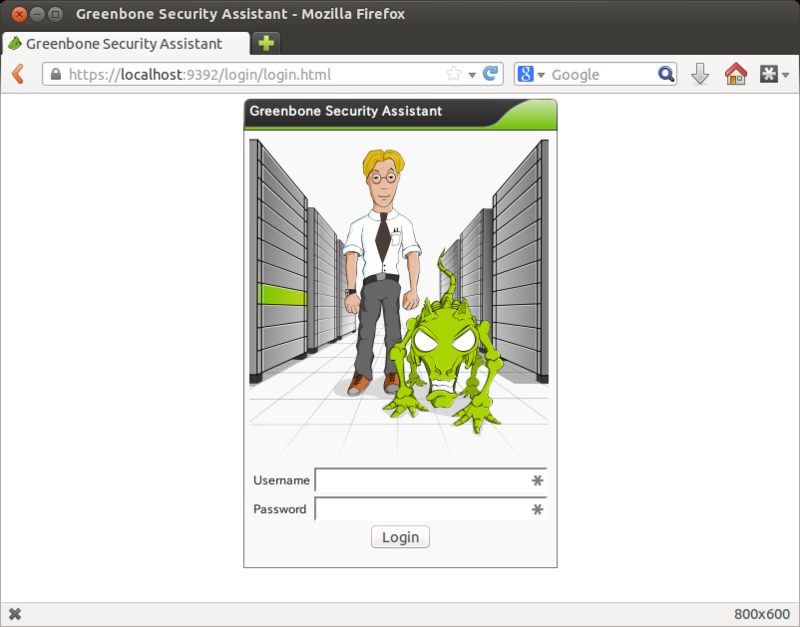
ログイン用アカウントはStep 3の「ユーザー「admin」追加」で作成したもの。
ログインすると下記の画面が表示される。
脆弱性診断方法
OpenVASの具体的な使用方法は……いつかそのうち……そう遠くない将来に……確実に……どこかで……

- 作者: Willie L. Pritchett,David De Smet
- 出版社/メーカー: Packt Publishing
- 発売日: 2013/10/15
- メディア: Kindle版
- この商品を含むブログを見る